
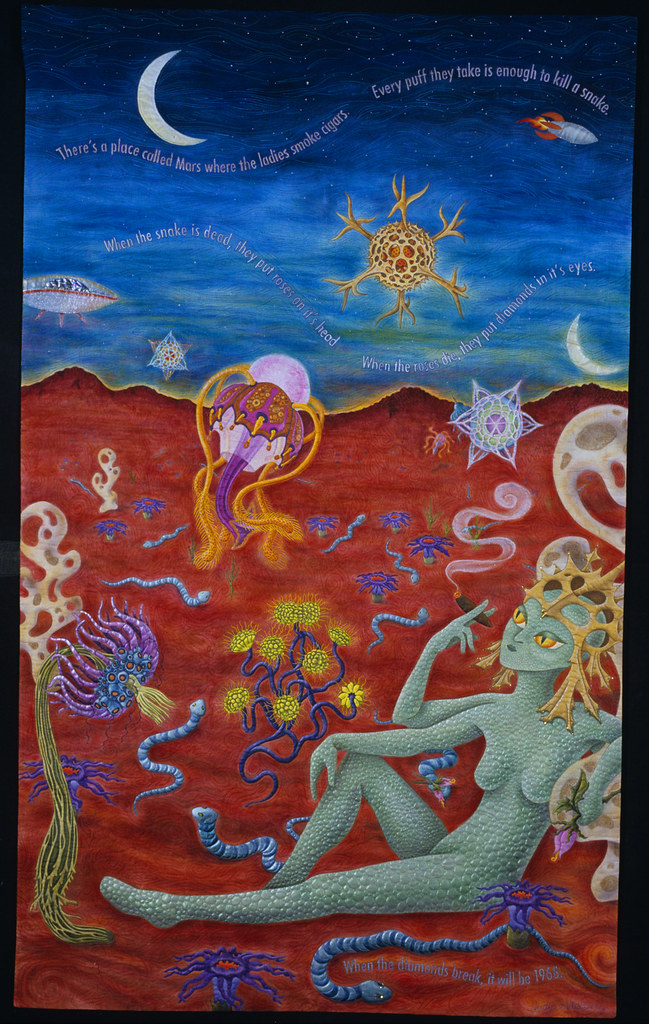
 I thought I would share a kind of a step by step process of creating my Martian quilt. My last few quilts I have worked up my initial designs on the computer. I start by scanning in line drawings then arranging and scaling them on Photoshop. Once I have things the way I want them I open my file in Adobe Illustrator, scale the image up to the size I want and print out the cartoon by selecting tiling in the print dialogue box. I join all the sheets together using clear packing tape, this makes it nice and strong. I lay my pfd fabric over the top and tape it securely to the top edge of the paper. I can see quite clearly through my white fabric and trace the design in pencil onto the fabric. I usually leave my design under the fabric while I do my painting.
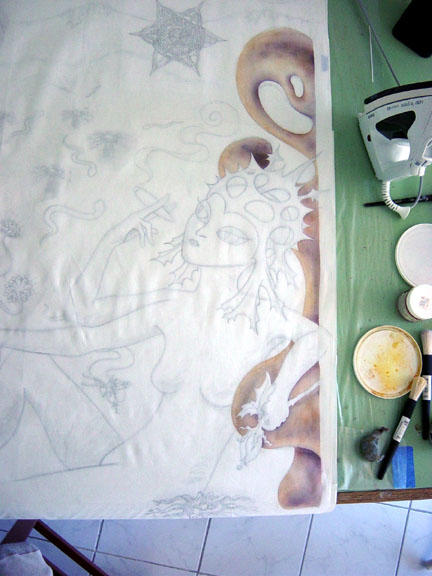
On this quilt I wanted it to have a soft atmospheric quality, so I decided to try the D’uva chromacoal powders. I cut freezer paper templates of everything on the quilt. I ironed down a freezer paper template around the weird rock shape to protect the surrounding fabric. Using a stiff stencil brush I applied the chromacoal powders.
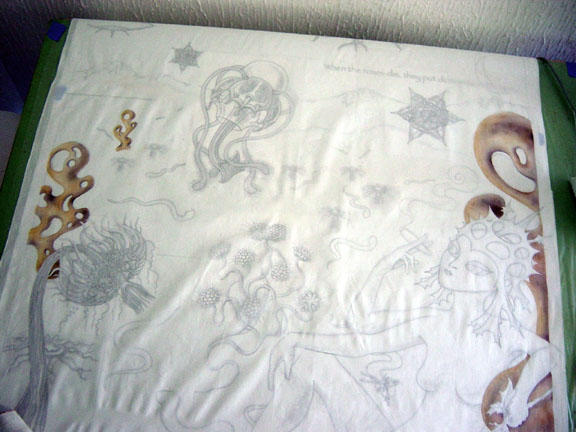

I put in the reverse freezer paper templates to color the background. This all has to be heat set when done. I put it in the oven for several minutes at the suggested temperature.

I inadvertently got a grease spot on it from the oven and then had to paint in another floaty alien thing.

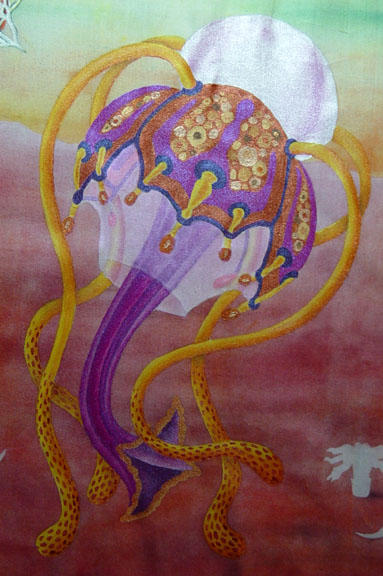
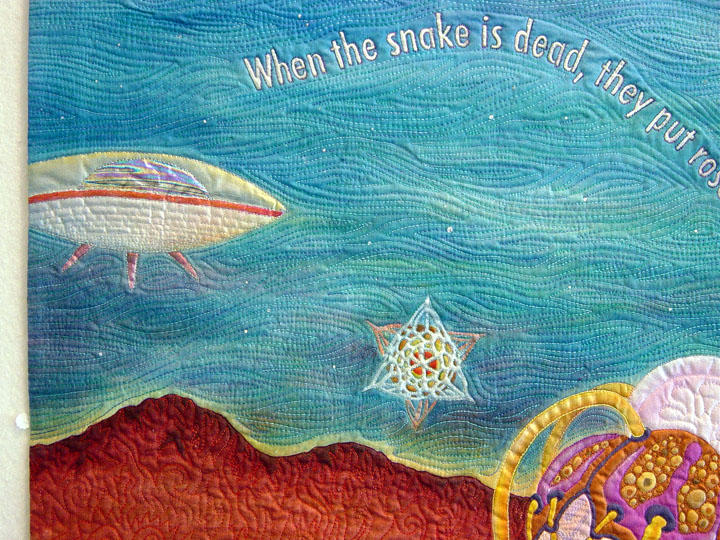
This orb is painted with tsukineko inks and the jellyfish below is painted with Jaquard Lumiere, and Setacolor textile paints.
After the painting was completed. I layered the quilt with wool batting and a hand dyed back fabric. Next I hand basted the heck out of it. Wool does not have a scrim and things can shift very easy while machine quilting.

I outline quilted the painted type to help it stand out. Silver paint didn't seem like enough for the space ship so I foiled the window.
 I did not want a traditional binding framing the quilt so I chose to sew the binding on and turned it to the back.
 I had my husband take some slides for me. When the slides came back the colors were more vibrant on the reds than the actual quilt. And I liked it better! It really started to bug me and so I put the quilt back on the table and pulled out a red Shiva paint stick. I found a sample scrap of fabric that I had used to experiment with the chromacoal powders for the planet surface and tried out the paint stick. It seemed to give me the color I wanted so I bit the bullet and re-colored the surface of my finished quilt. SCARY.
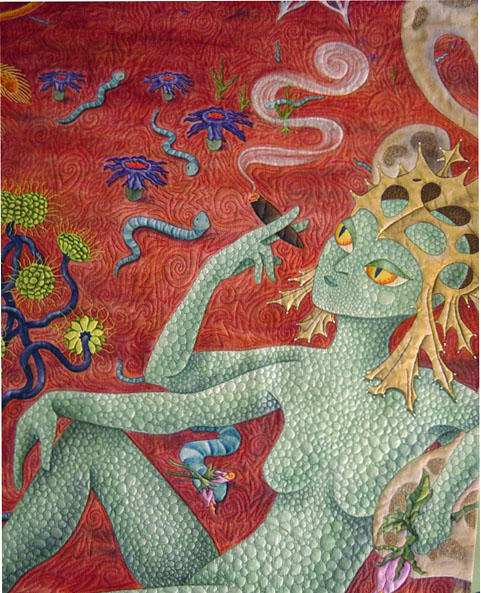
I also used a purple Shiva paint stick to enhance the shadows on the Martian woman. I tried beads on the quilt in various places but decided the only place I wanted them was on the Martians helmet and one large one on the eye of the snake lying next to her.


I can't tell yo how much I adore this quilt!! I just found this post today, a link from one of your tutorials. Thank you for sharing your process in making this quilt. Can't really believe there aren't a hundred comments here - I am just in love with this quilt!
ReplyDeleteHi Lori, that's because this quilt is also in other places on my main blog. You will see lots of comments on this post
ReplyDeletehttp://judyperez.blogspot.com/2005/06/theres-place-called-mars.html
but they mostly reference the song lyrics, pretty fun to see all the variations.