
I know some people might be afraid to sew metal on their sewing machine, so to dispel any fears I thought I would make a short video demonstrating how I sew metal on my Fiesta Ornaments.
I want the thread to show up well against the metal so I use a bright colored heavy weight cotton thread in the top and a matching color thread in the bobbin. Generally I use a top stitch needle, but often I just sew it with whatever needle I have in the machine with no problem.
Thursday, October 23, 2008
Friday, October 3, 2008
Making Felted Balls
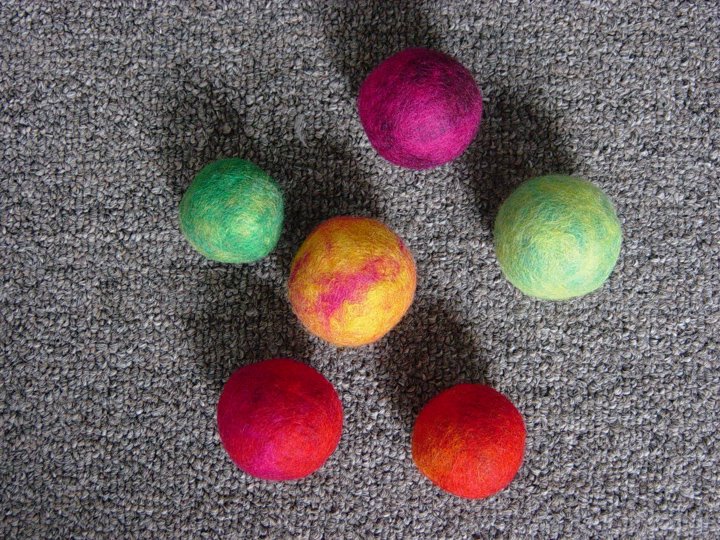
 To make the ornaments shown in Quilting Arts Gifts, you need to make felted wool balls or you can buy pre-felted balls from the Artgirlz or Quilting Arts. I like to make felted balls myself because I can have fun playing with colors and shapes. How to make the felted balls is explained in the article, but it does not have photos with all the steps. So, for all you visual learners here's how I do it.
Warning: once you start making these it will be really hard to stop.
This is a great way to use up leftover yarn, by rolling golf ball size yarn balls as a base for the ball. Wind yarn into oblong shapes to get a berry shaped ball. I usually use wool yarn because I know it will felt better, but in a pinch I have used other yarns too. My favorite place to order roving is from Outback Fibers, the colors are gorgeous and the prices are very reasonable.
 Unwind a length of roving, while holding it in one hand, grasp the end portion with the other hand and gently pull off "tufts" roughly 5-6 inches in length. Spread the fibers into a thin flat layer with all the strands going in one direction. Pull off another tuft of roving and layer it on top of the first at a 90 degree angle. Repeat this process several more times, criss-crossing 4-6 thin layers.
 When lifting the blanket of roving there should not be thin spots or holes. Changing the colors of yarn in the layers will create a heathered multicolored wool ball.
 Close the roving covered yarn ball in your hand and bring it to the foot of a knee hi panty hose. (buy cheap ones at the dollar store, or use those ancient ones in the back of your hosiery drawer that you never wear anymore) Gently remove your hand from around the ball and tie and knot a small piece of yarn around the hose to secure the ball in place.
 When all the balls have been wrapped in the hose, place them in the washing machine, set the water to lowest level and hottest setting. Add a small amount of detergent, about a tablespoon, the exact measurement is not crucial but soap is important in the felting process. I usually run it on a long cycle, the more agitation the better the felting. Good old fashion top loading washers have the most success with felting.
When you take the chain of balls out of the machine, you will see little fibers have come though the mesh of the hose. Snip the tied yarn between the balls, gently peel away the hose removing the ball and roll the ball in your hands to smooth the fibers.
Click here to watch a video tutorial for making felted balls.
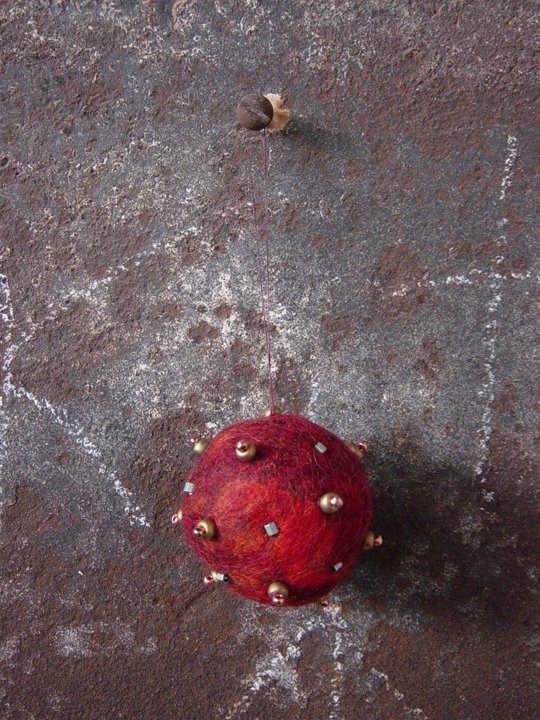
 These would make great cat toys but dogs will want to shred these to smithereens. My chihuahua thinks there is nothing more fun than stealing felted balls when I am not looking and peel all the fuzz off.
These are some of the ornaments I have made adding wool felt, embroidery floss and beads.


Subscribe to:
Posts (Atom)


